Learn hub

Craft philosophy, harvest clarity, and finish discipline in one place.

The Learn section covers what craft cannabis actually means, how to read trichomes before harvest, when to move buds to jars, and how to protect quality through drying and curing. These pages exist because the grow is only half the story.

Most beginner pain happens after harvest. A clean grow with a sloppy finish is still a sloppy finish. These guides are the other half of the system.

Craft philosophy What the word actually means, how it gets diluted, and what it looks like when it holds up.
Harvest timing Trichome reading, ripeness windows, and how to make the harvest call without rushing or second-guessing.
Drying and curing The finish chain that either preserves or quietly unravels everything the grow built.
Editorial still life showing a cannabis jar, pruning shears, a loupe, and craft handling notes.
Craft becomes visible in the finish — in the jar, the aroma, and the absence of excuses.

How to use this section

Read the philosophy once. Return to the finish guides when the plant is asking.

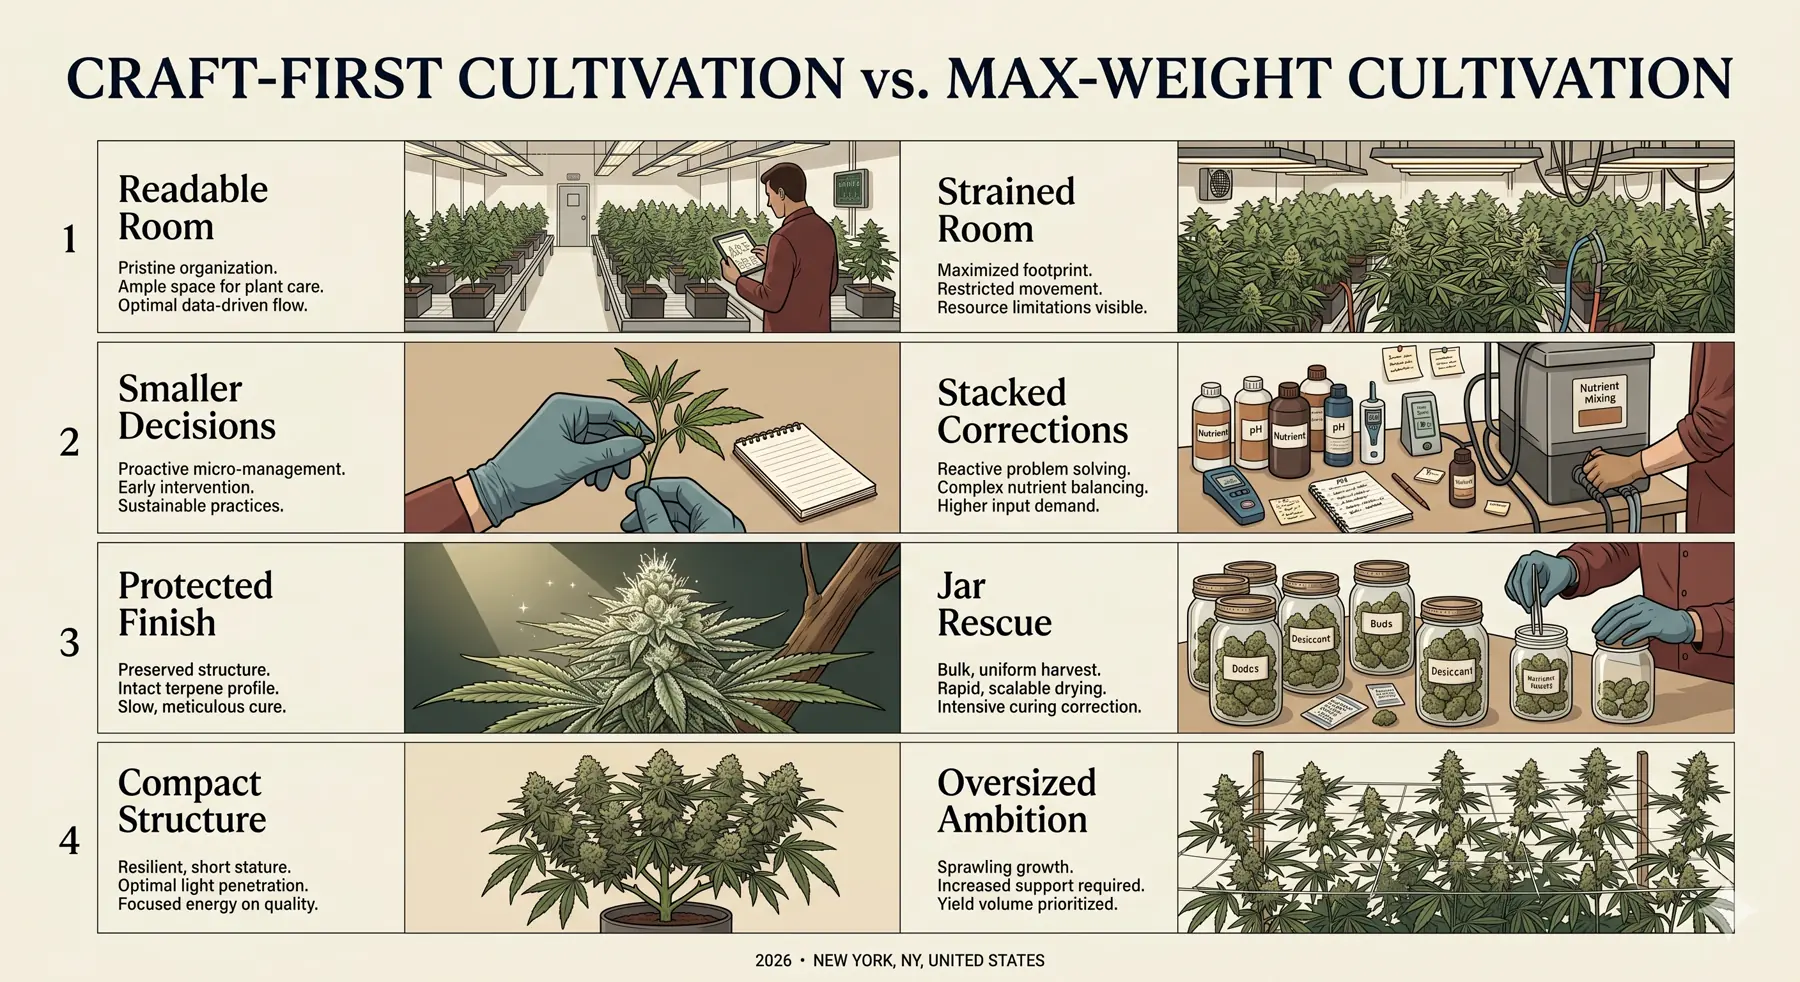
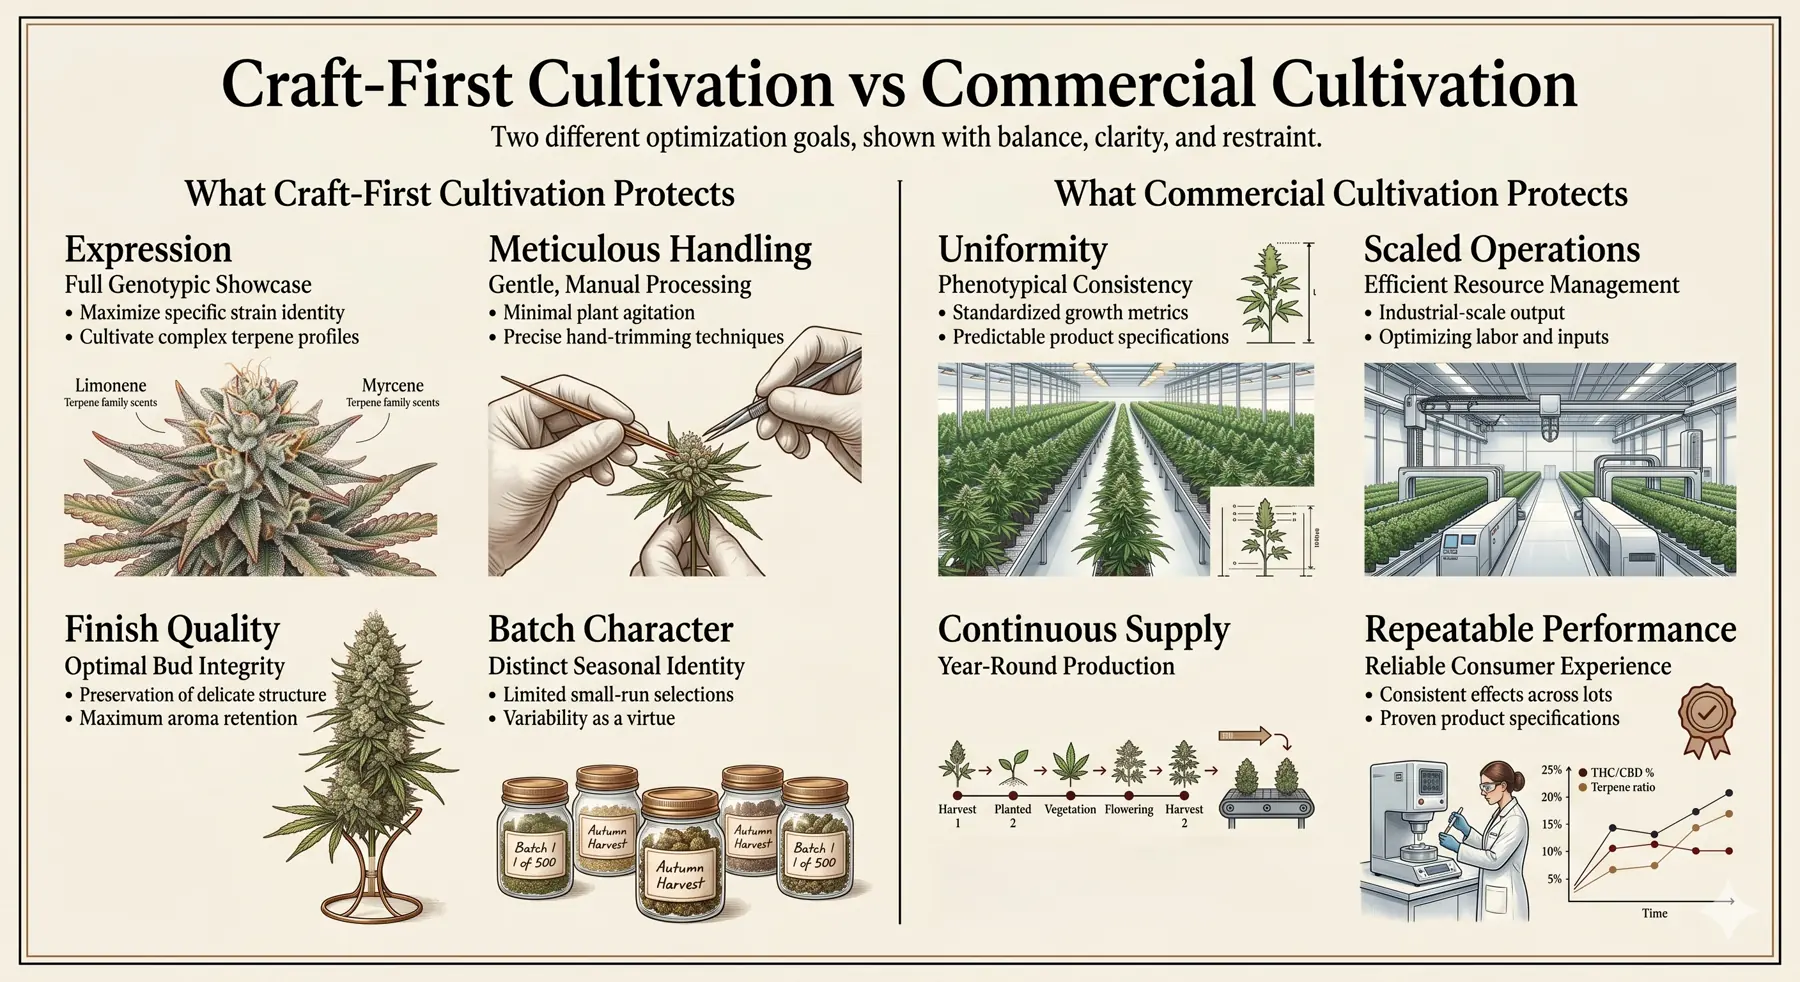
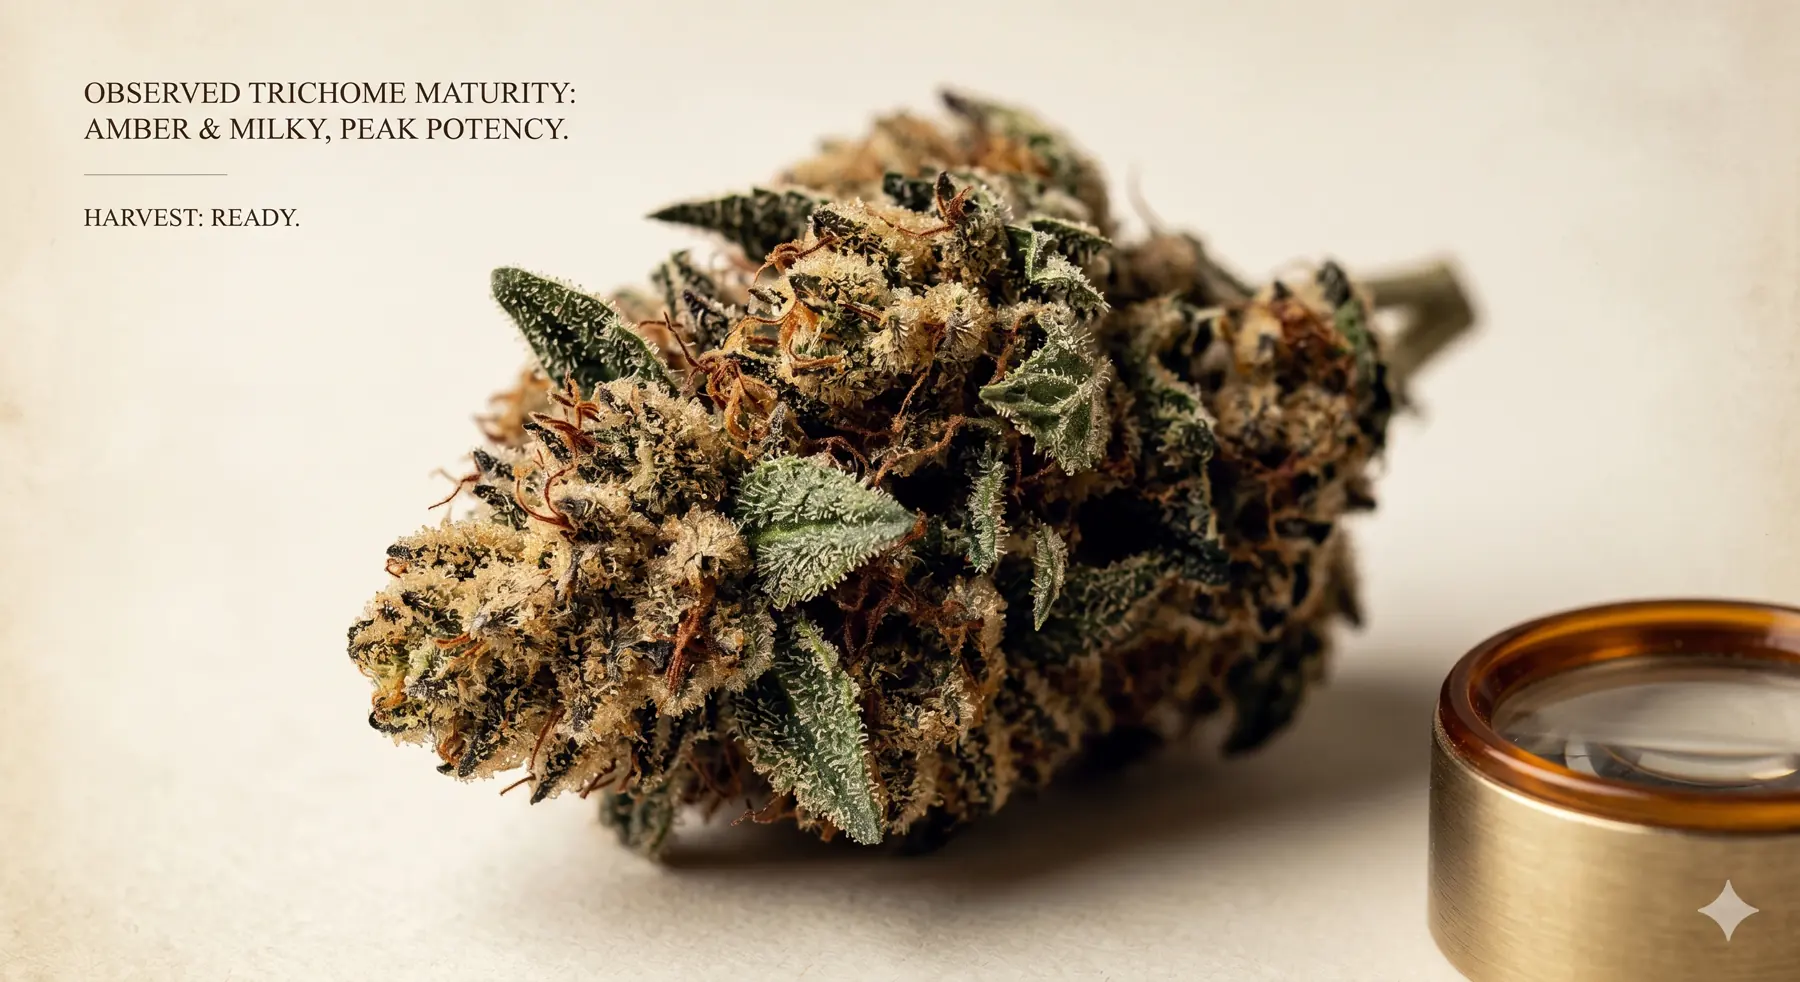
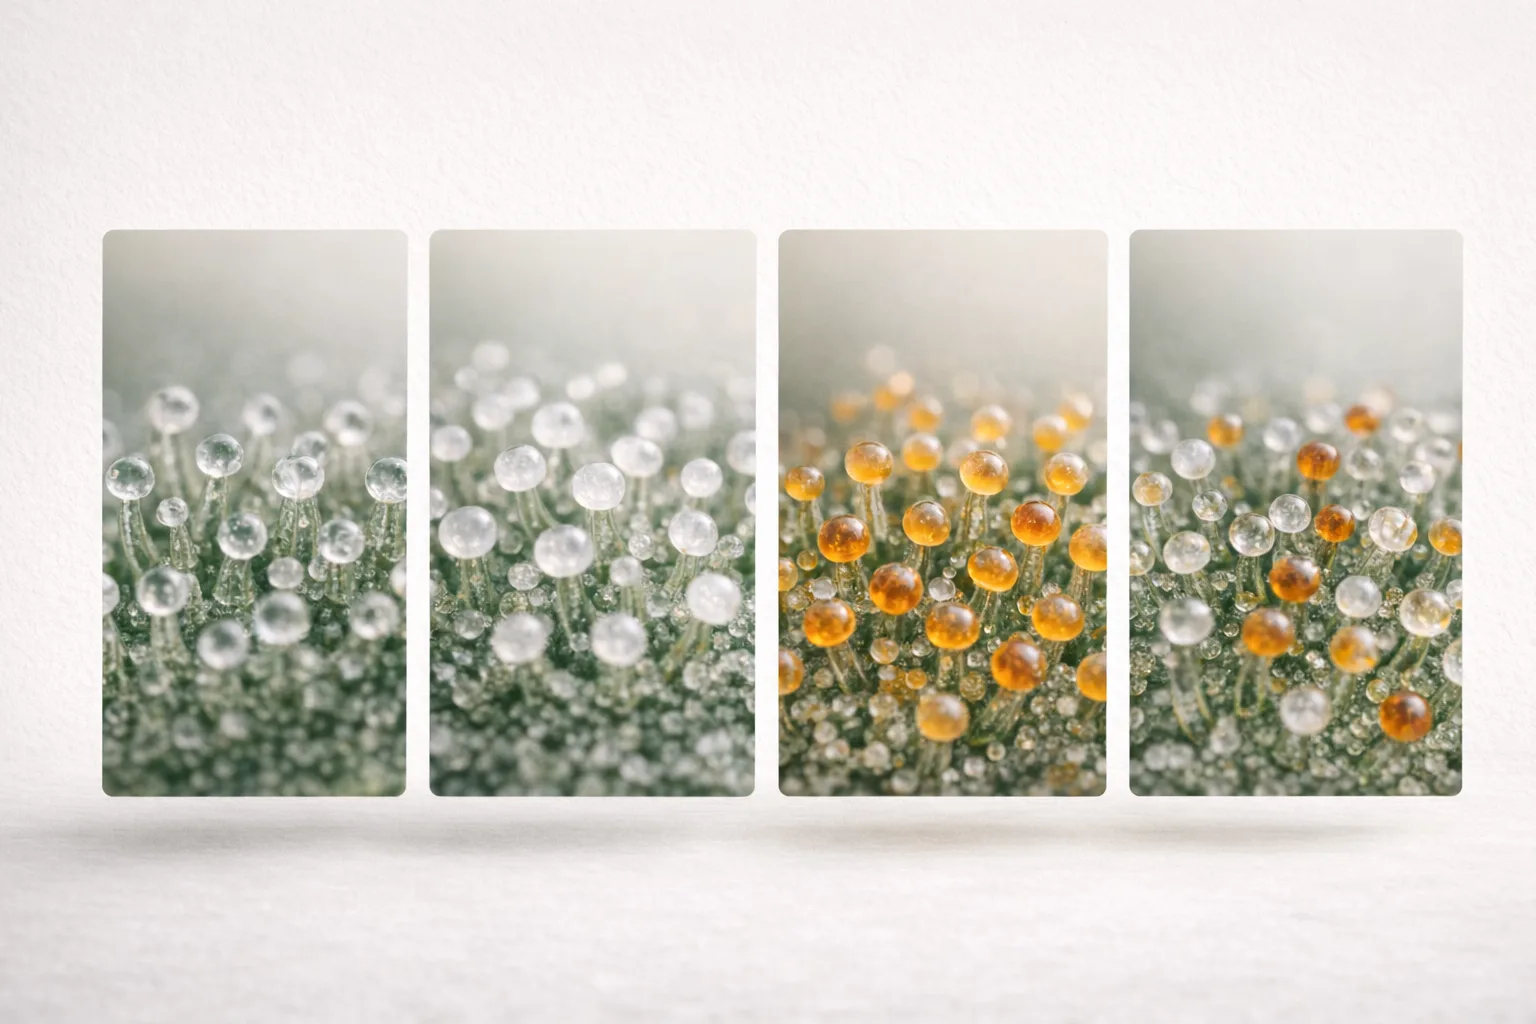
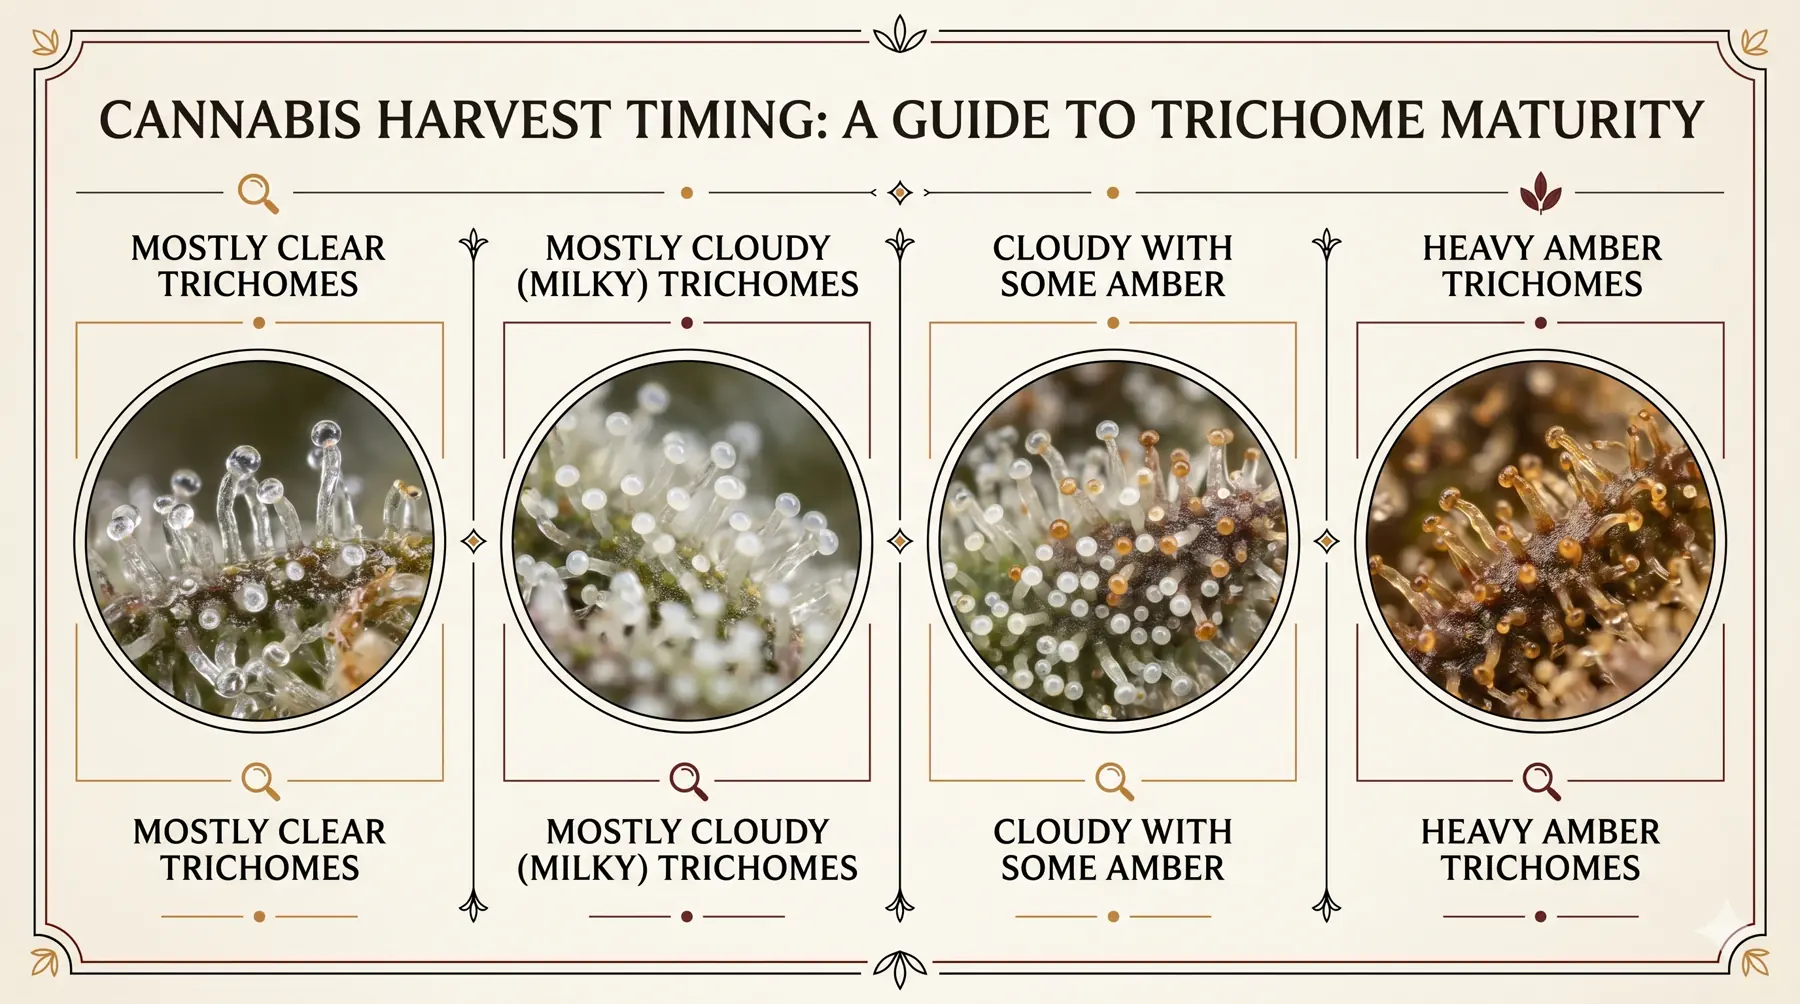
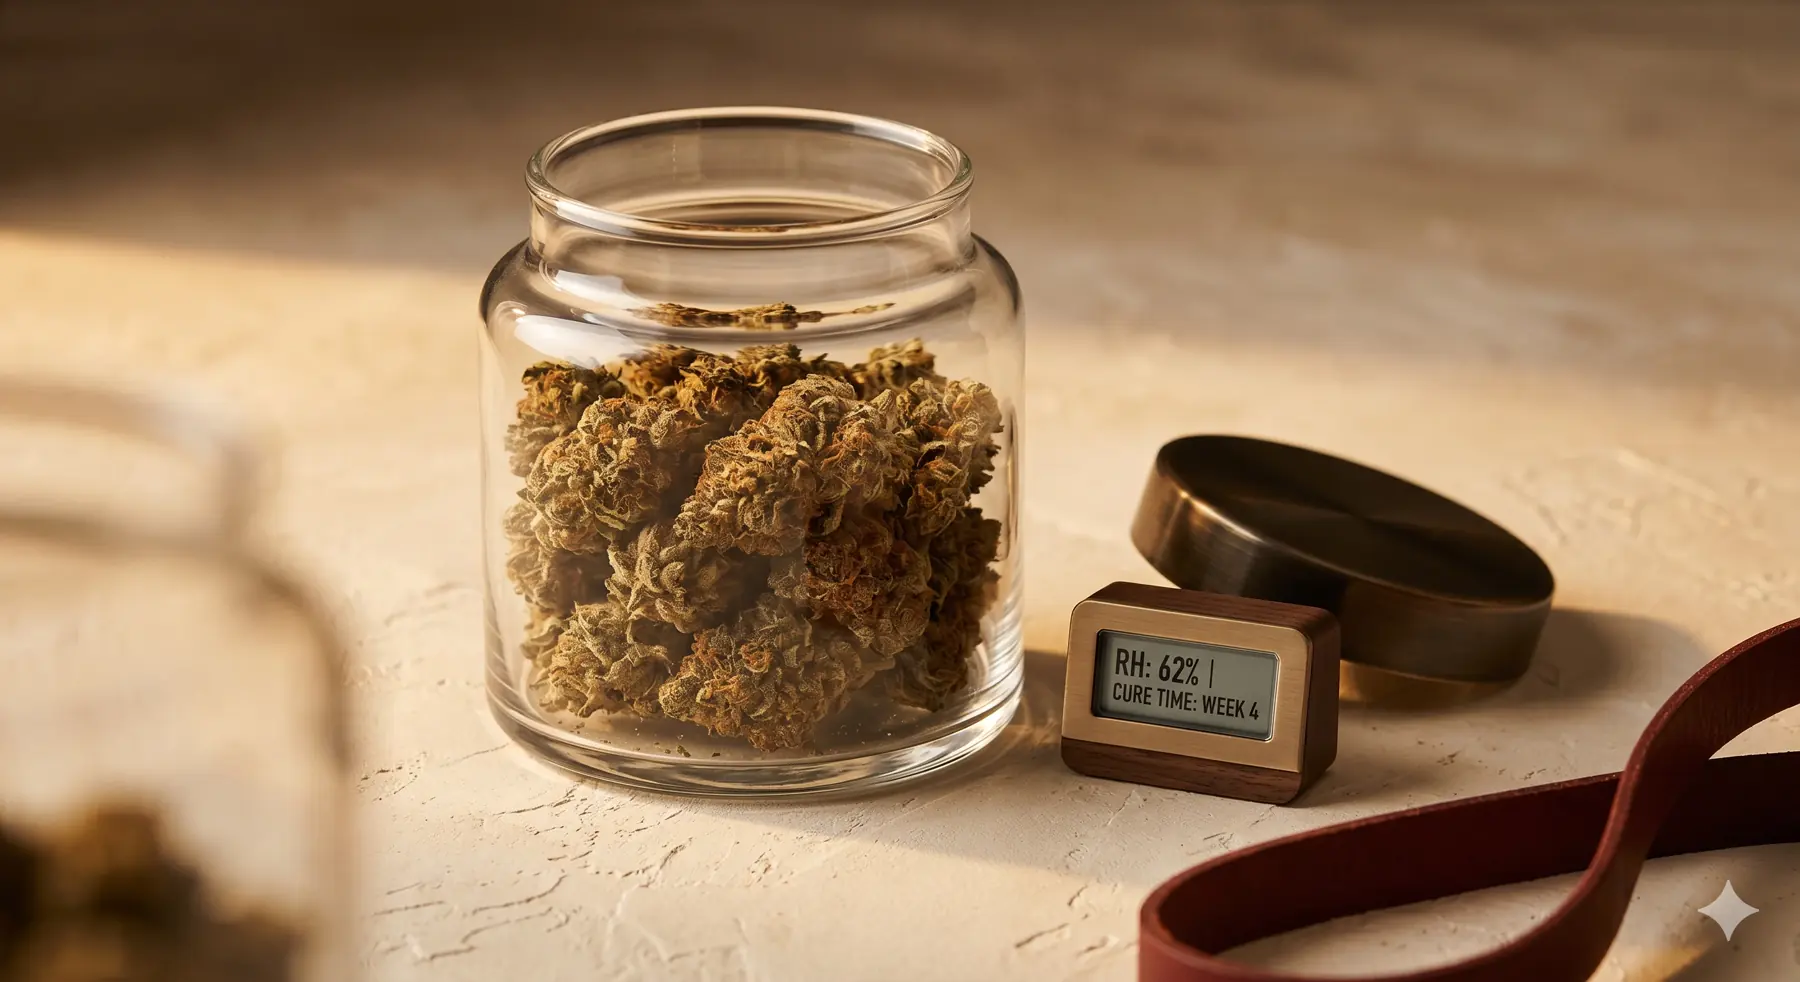
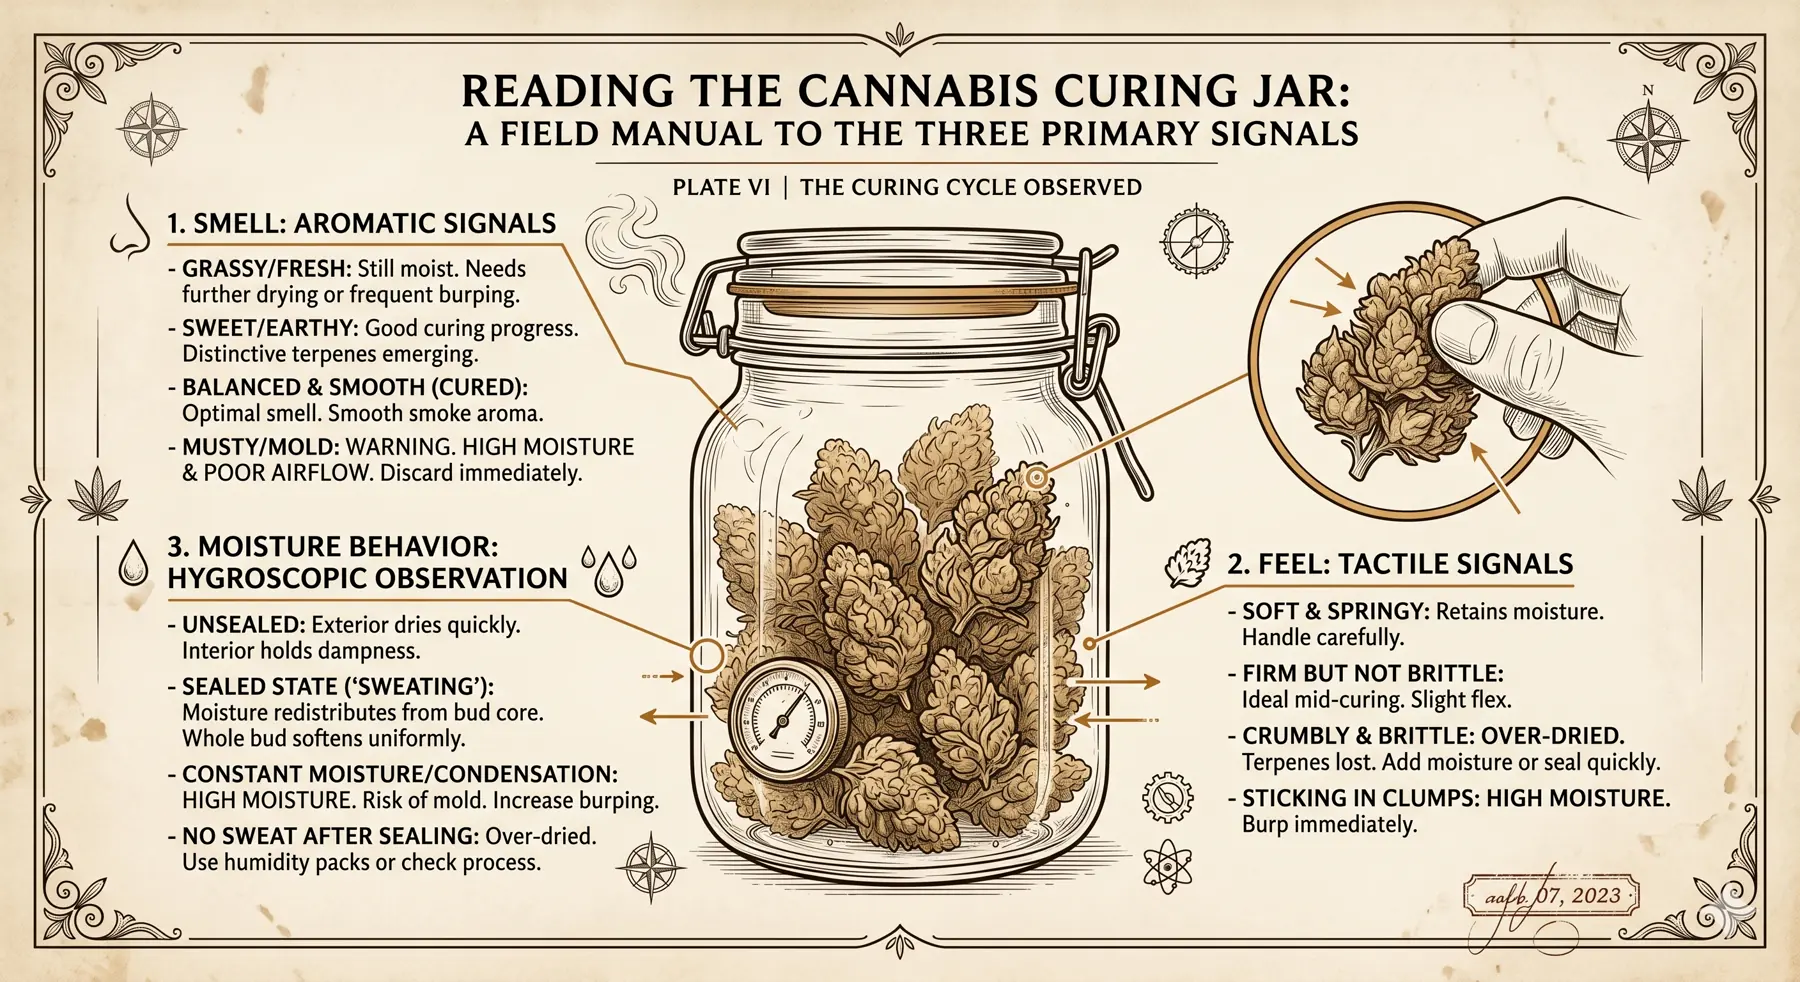
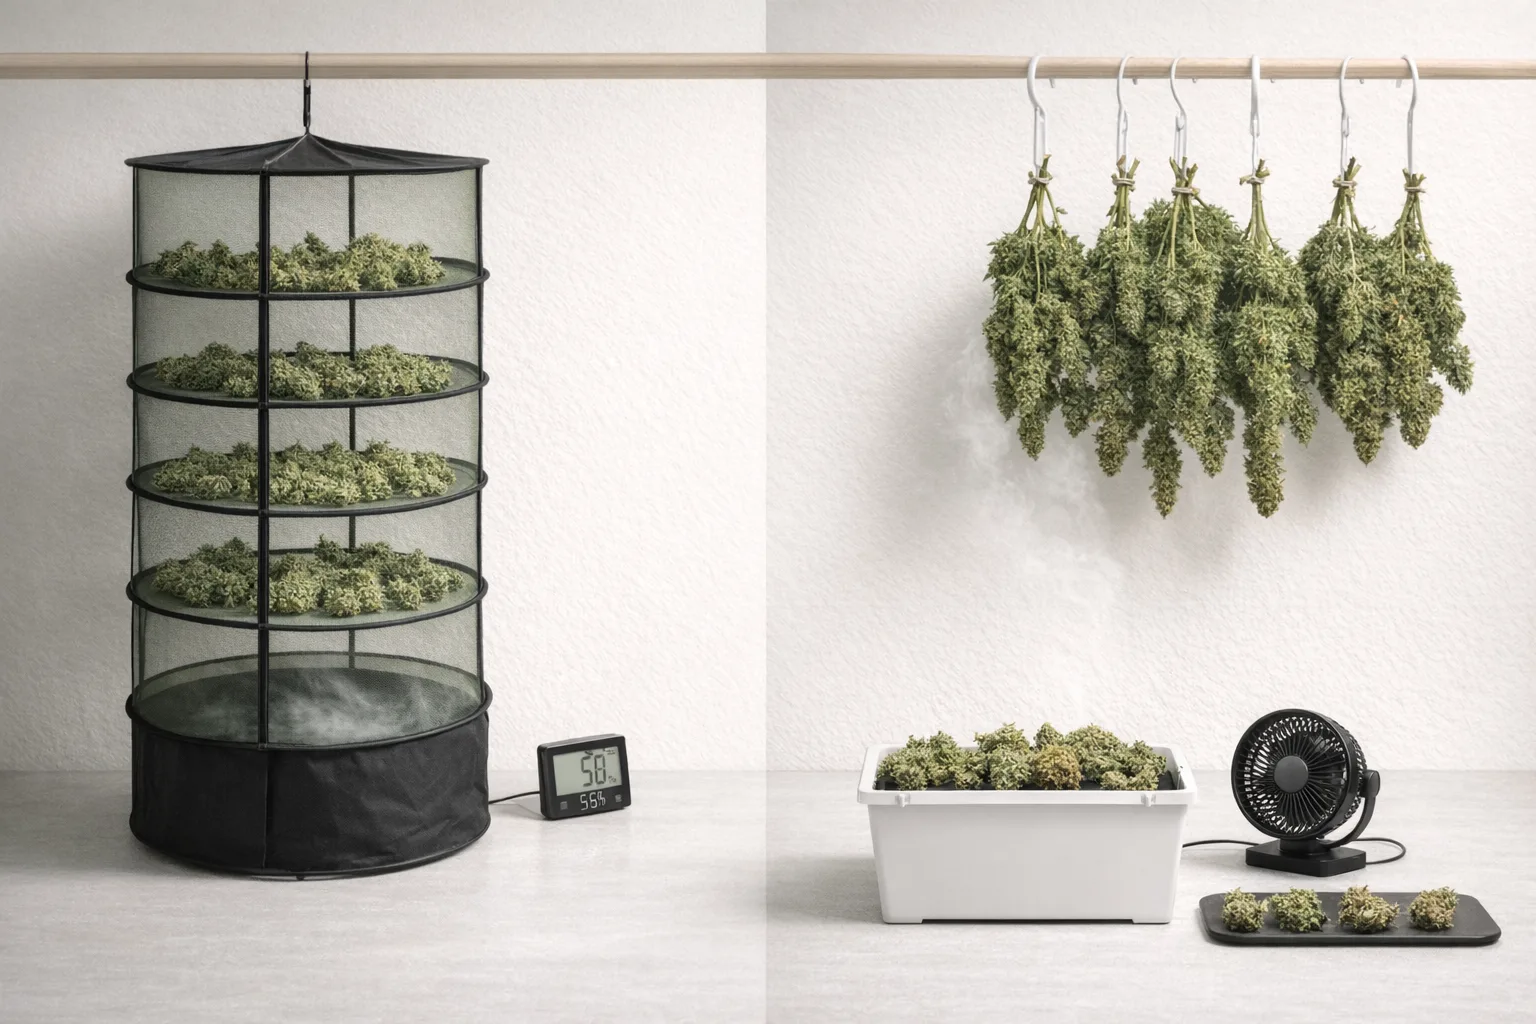
The craft pages explain why quality matters more than weight. The harvest pages tell you when to act. The drying and curing pages tell you how not to lose what the grow built. Use them in that order when a run is active, or use them in any order to fill in the gaps.

Craft philosophy

The word earns its weight when the process can survive scrutiny.

Craft gets diluted quickly because it sounds premium without requiring proof. These pages put the word back in the room where it can actually be tested — in the method, the harvest decision, and the finish that follows.

Editorial still life representing craft cannabis philosophy.

What Is Craft Cannabis?

The definition, why the term gets abused, what it is not, and what process discipline makes it real.

Read guide
Comparison board showing craft-first cultivation versus max-weight cultivation.

Craft Cannabis Cultivation

How craft discipline translates into room logic, method fit, harvest decisions, and finish planning.

Read guide
Comparison board showing what craft protects versus what commercial cultivation protects.

Craft Cannabis vs Commercial Cannabis

A clean side-by-side on what separates craft from commercial logic — handling, finish, and what gets protected.

Read guide
Harvest timing

The harvest call is where craft either holds or quietly collapses.

A rushed harvest or a misread trichome window is irreversible. These pages teach the visual and physical signals that remove most of the guesswork before scissors come out.

Mature cannabis flower used for the harvest ripeness guide.

Harvest Ripeness

The master harvest guide — when to cut, when to wait, and how to read the plant without getting baited by one ripe-looking top.

Read guide
Comparison board showing clear, cloudy, amber, and mixed trichome inspection states.

What Are Trichomes?

The quick-answer definition — what trichomes are, why growers inspect them, and which page to go to next.

Read guide
Harvest timing chart showing trichome maturity stages.

Cloudy vs Amber Trichomes

The tighter visual comparison for growers who need to make the harvest call precisely instead of estimating from a general guide.

Read guide
Drying and curing

This is where the run either lands well or quietly falls apart.

Drying and curing are not the epilogue. They are the finish chain that determines what the jar actually holds when it is finally opened. Most runs that disappoint do not fail in veg — they fail here.

Curing state board comparing too wet, on track, and too dry jars.

What Is Curing?

The quick-answer definition — what curing means, why it happens after drying, and where to go next in the finish workflow.

Read guide
Cannabis curing jar used for the cure guide.

How to Cure Cannabis

The full curing workflow — drying conditions, jar readiness, moisture management, burping rhythm, and how to tell when the cure has settled.

Read guide
Jar reading diagram for smell, feel, and moisture behavior.

Buds Ready for Jars

How to read stem behavior, outer texture, and hidden interior moisture so the handoff from drying to curing does not go backwards.

Read guide
Board showing common cannabis drying mistakes.

Common Drying Mistakes

The post-harvest errors — too much direct airflow, unstable humidity, overcrowded drying conditions, and moving to jars before the flower is actually ready.

Read guide
Cure state board comparing too wet, on track, and too dry jars.

Common Curing Mistakes

What goes wrong in jars — wet rebound, grassy smell warnings, overhandling, overdrying, and how to read whether a cure is stabilizing or drifting.

Read guide
The finish chain

Harvest, dry, cure. In that order. With that much attention each time.

The three stages do not operate independently. A clean harvest makes drying easier. A careful dry makes curing more predictable. A well-run cure makes the jar worth reopening. When one stage is improvised, the next stage pays for it. That is why the Learn section treats all three as one connected workflow rather than three separate finishing tasks.

The rest of the system — the room, the method, the root zone — exists to bring the plant to that finish chain in the best possible condition. What happens after harvest is not less important than what happened before it.

Philosophy line

Anyone can grow. Few people preserve what the grow built.

  • Harvest timing is not a feeling. It is a reading.
  • Drying speed is not convenience. It is chemistry.
  • Curing patience is not optional. It is where quality is kept or lost.